Star Flower Pinwheel Sweater

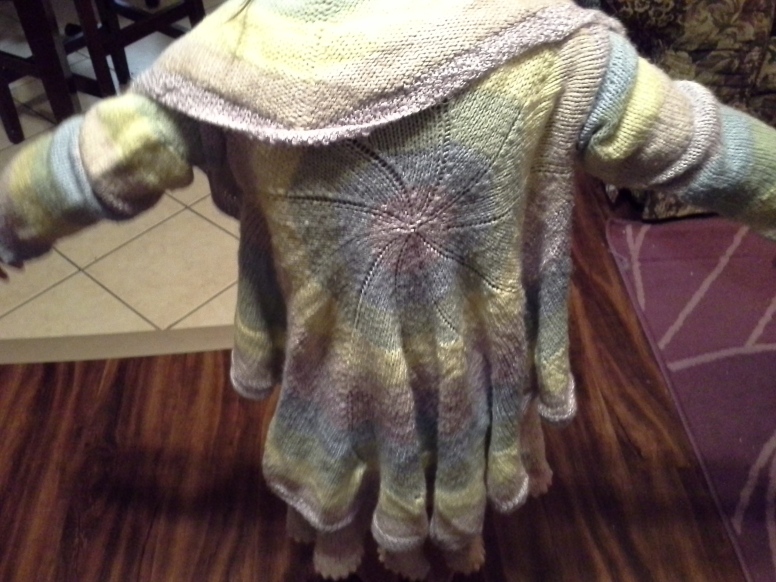
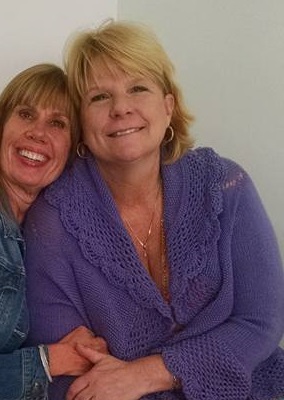
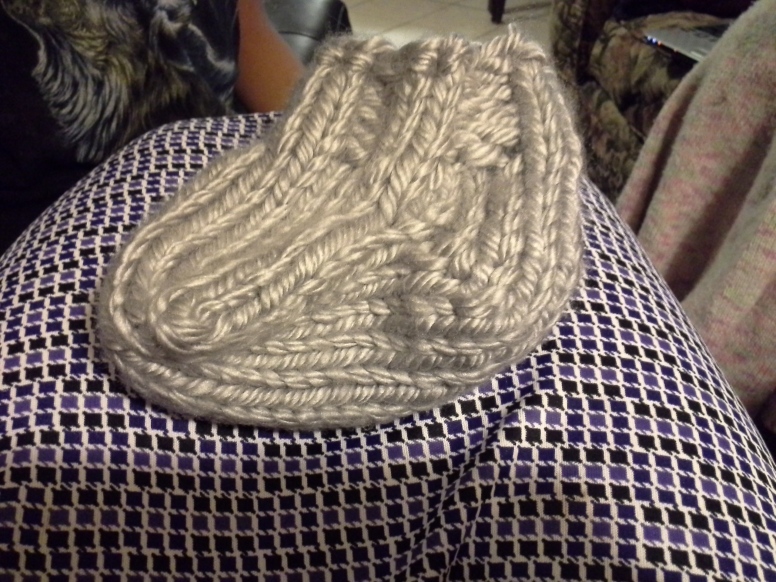
Beautiful isn’t it? This is the beginning of a Star Flower Sweater pattern I’ve been working on. I will keep adding more as the sweater progresses. Right now it is only 12″ across and it needs to be 16″. For this tutorial I am making it in X-Small for more sizes please come back later and I will post the Offical pattern link when I am finished making it.

For and easier version of this sweater, you can also visit the other Pinwheel Sweater Tutorial at Swirls Pinwheel Sweater.

The Supplies:

  • Worsted Weight Yarn 1416 yarns. I used Hobby Lobby’s I Love This Yarn in Lilac
  • 5 mm (US 8) circular needles 40 cm
  • 60 cm and 80 cm (16”, 24”, and 32”).
  • 5 mm (US 8) double pointed needles.
  • 5 mm (US H) crochet hook
  • 8 Stitch markers
  • 2 stitch holders
  • scrap yarn.
  • tapestry needle

 Gauge:

16 st. and 24 rows = 10cm / 4″ on 5 mm (US 8) needles

Directions:

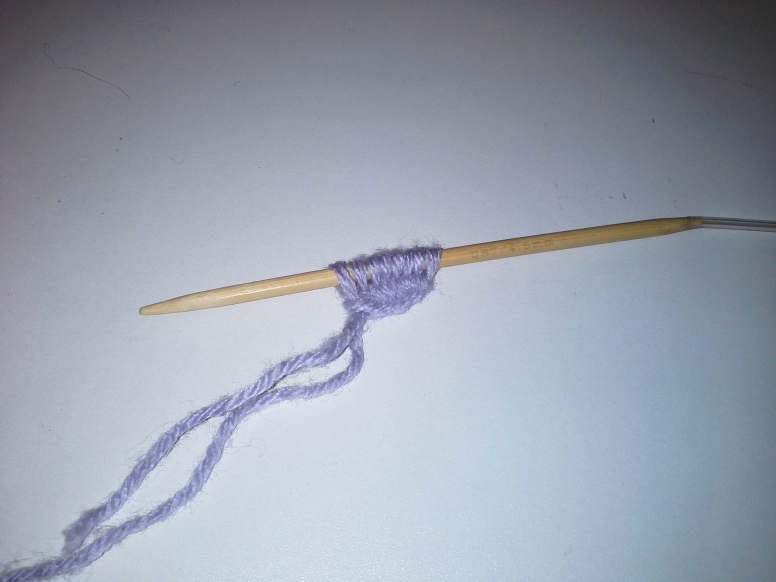
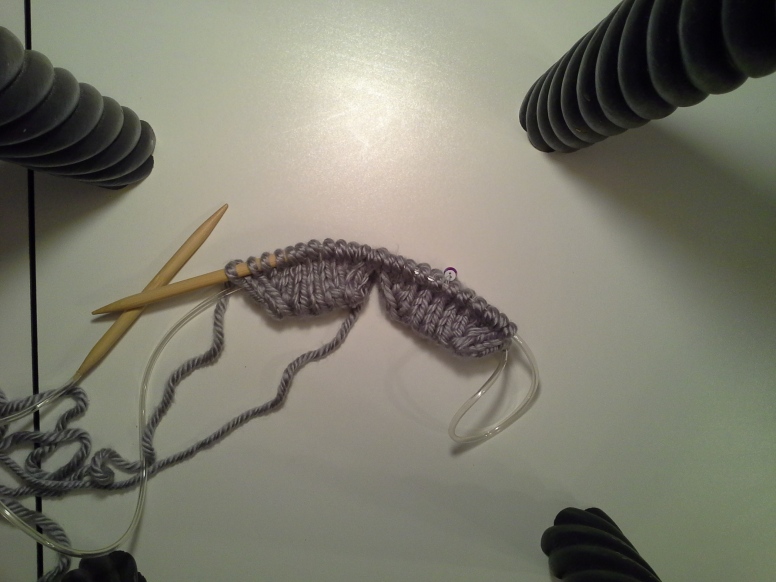
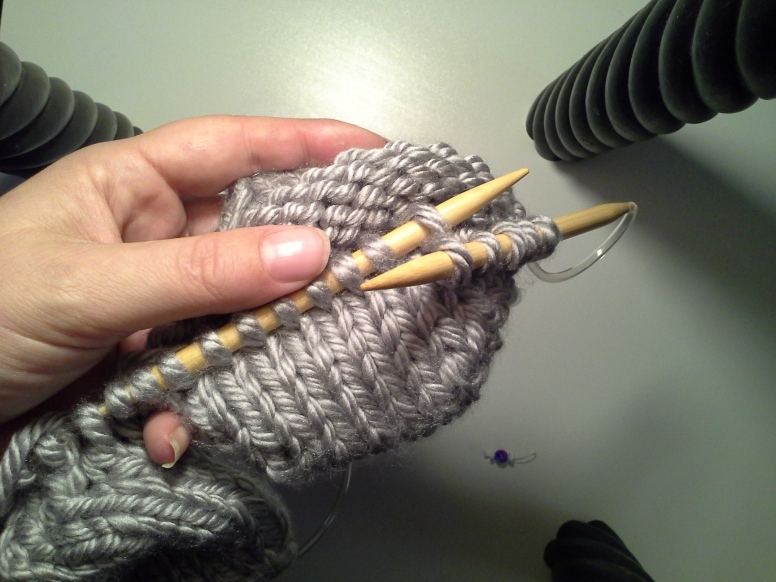
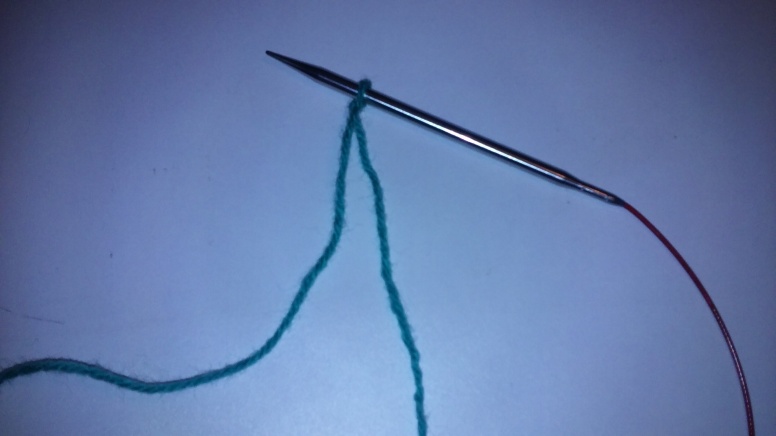
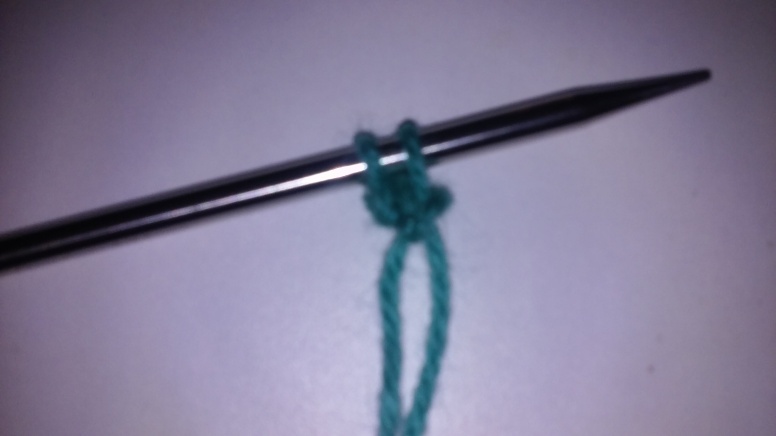
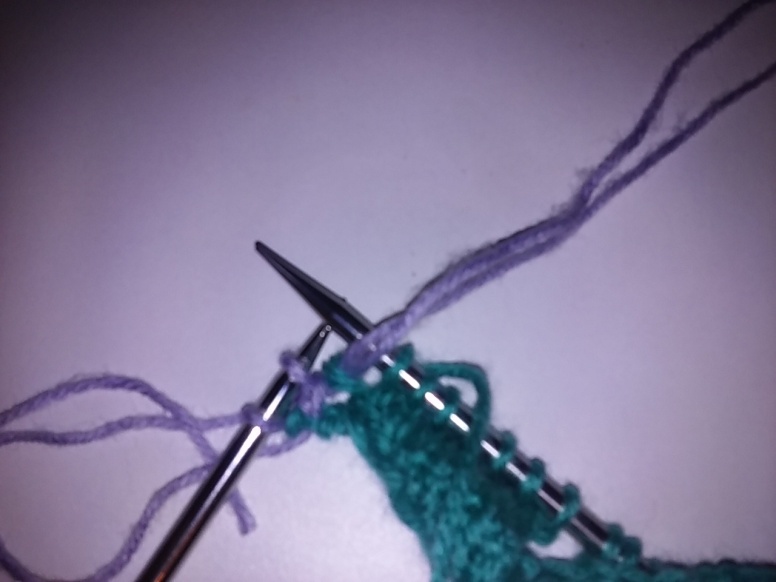
Using 5mm (US 8) double-pointed needles, or circular needles and cast on 8 stitches. Place 2 stitches  on the 1st needle, 4 stitches on the 2nd needle, and 2 stitches on the 3rd needle. You can also use the magic loop method if you prefer. I also like to use the sliding loop cast on so you don’t  have a big hole in the center of you sweater.

 20160809_172642

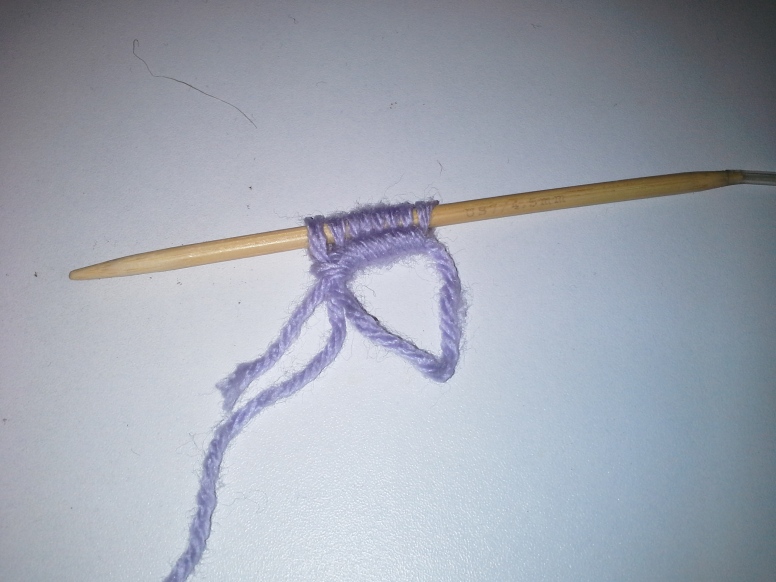
The picture above shows the sliding loop cast on. Here’s the Videos for the Sliding Loop Cast on and the Magic Loop Knitting Method:

Sliding Loop Cast On Video

Magic Loop Method Video

Round 1: Join in a round being careful not to twist the stitches. * yarn over, Knit 1. Repeat from * around. (16 stitches in round,) mark the beginning of the round with a stitch marker and move this up every round.

Round 2 and all even number rounds: Knit.

This may look difficult but it really isn’t

Round 3: * yarn over, knit 2. Repeat from * around. (6 stitches on 1st needle; 12 stitches on 2nd needle; 6 stitch on 3rd needle).

Round 5: * yarn over, knit 3. Repeat from * around. (8 stitches on 1st needle; 16 stitches on 2nd needle; 8 stitches on 3rd needle).

20160809_184615

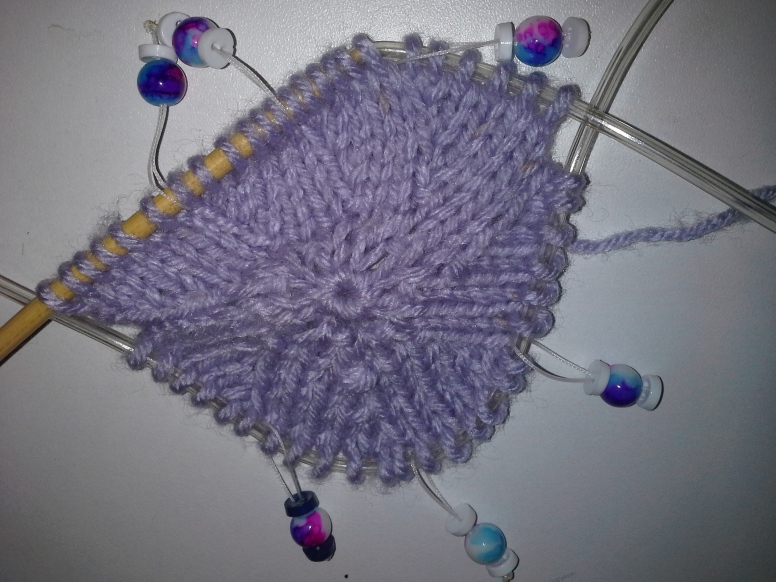
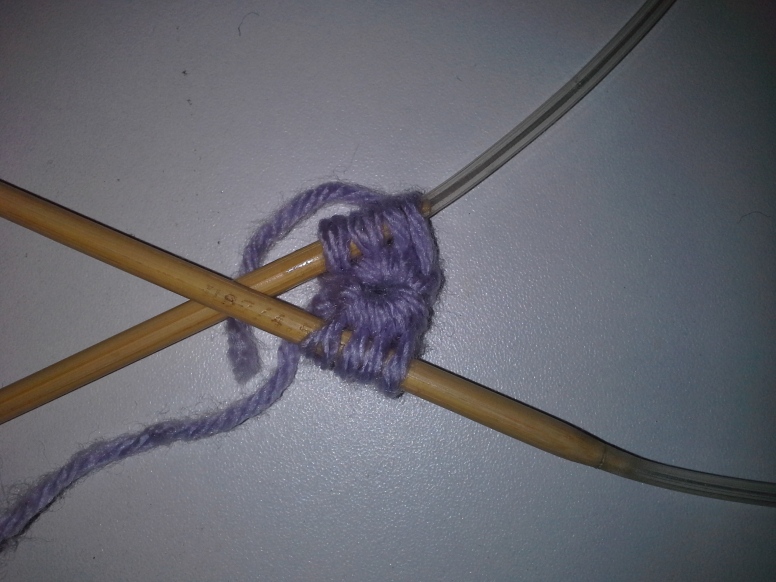
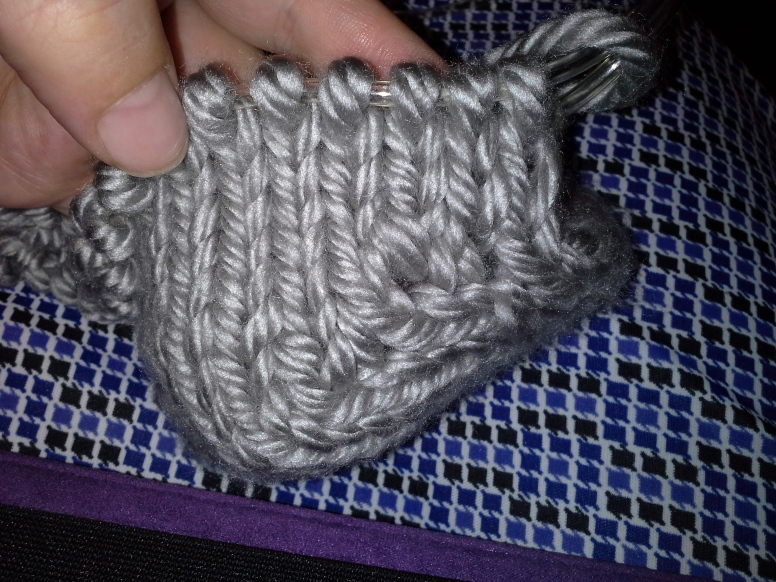
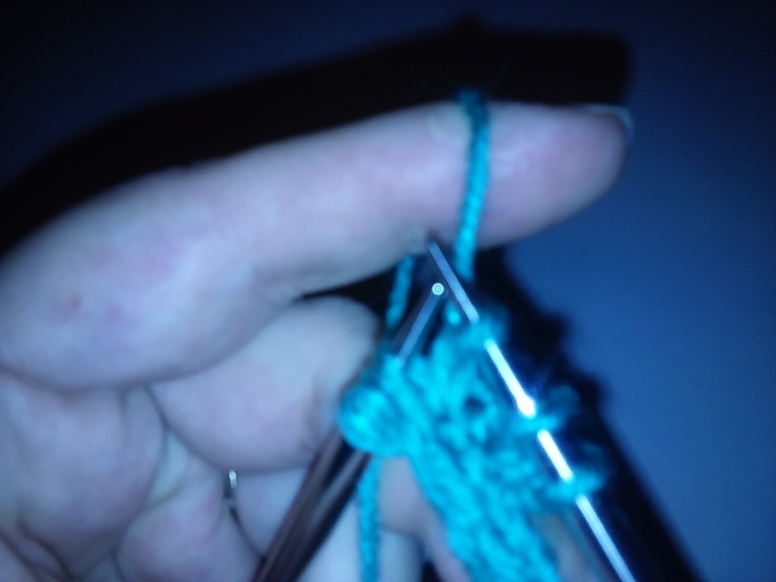
At this point place stitch markers after each section. The one with the blue buttons is after the first section and reminds me where the beginning of the round is. I made these stitch markers myself for just pennies compared to the more expensive store bought ones and they are so easy to make with these is at this link

Round 7: * yarn over, kni4, place stitch marker. Repeat from * around. (10 stitches on 1st needle; 20 stitches on 2nd needle; 10 stitches on 3rd needle).

Round 9: * yarn over, knit 5, slip stitch marker. Repeat from * around. (12 stitches on 1st needle; 24 stitches on 2nd needle; 12 stitches on 3rd needle).

20160809_223048

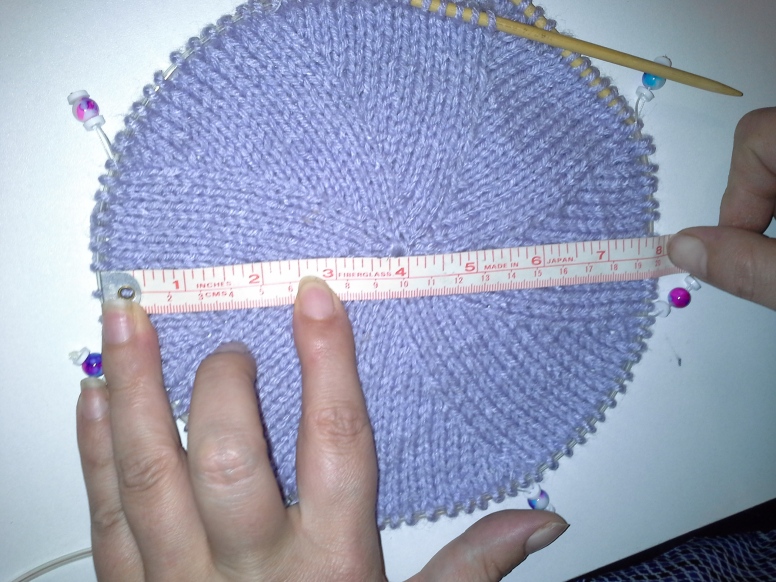
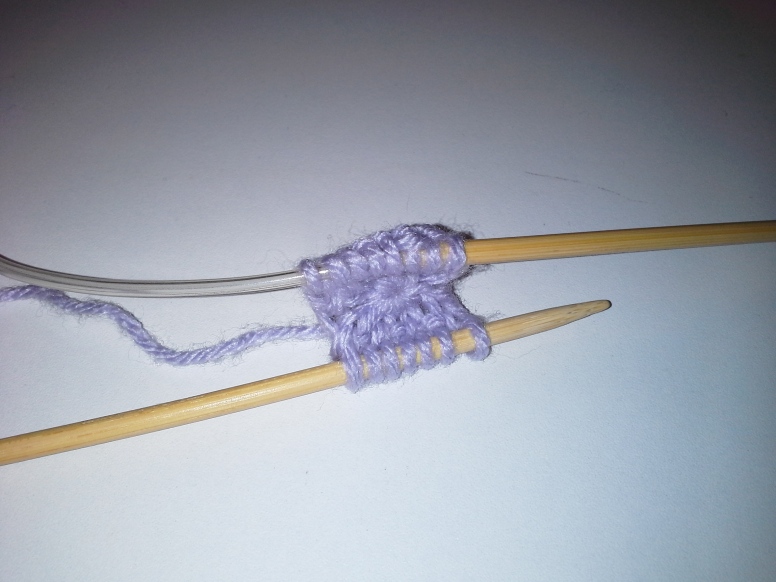
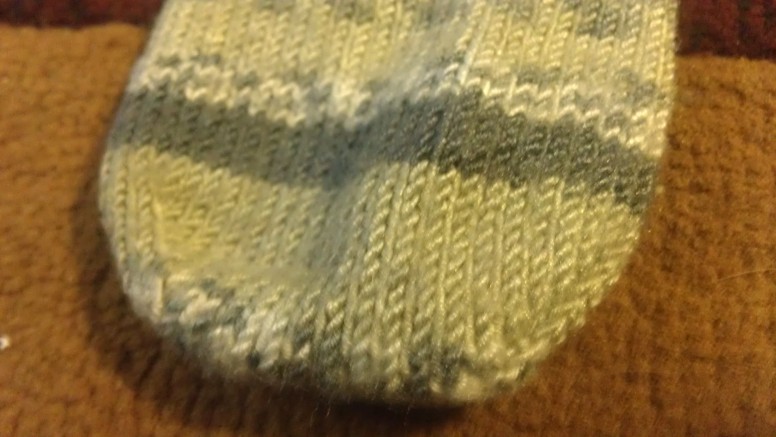
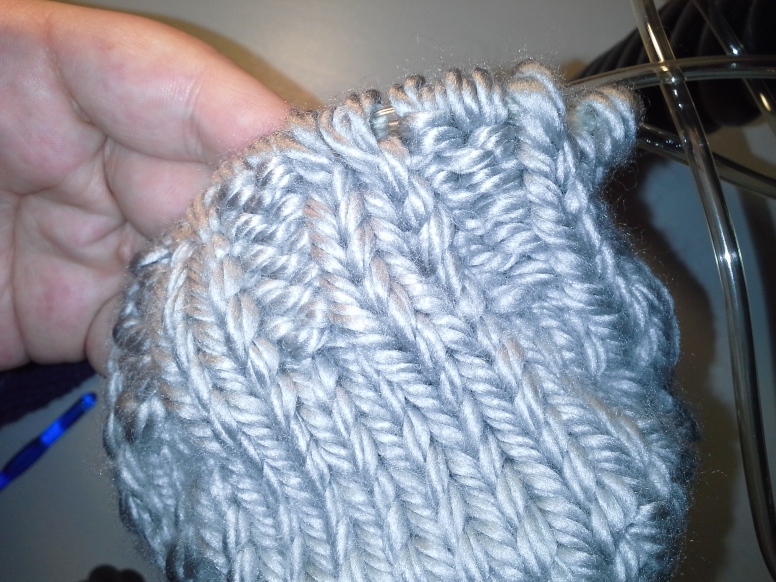
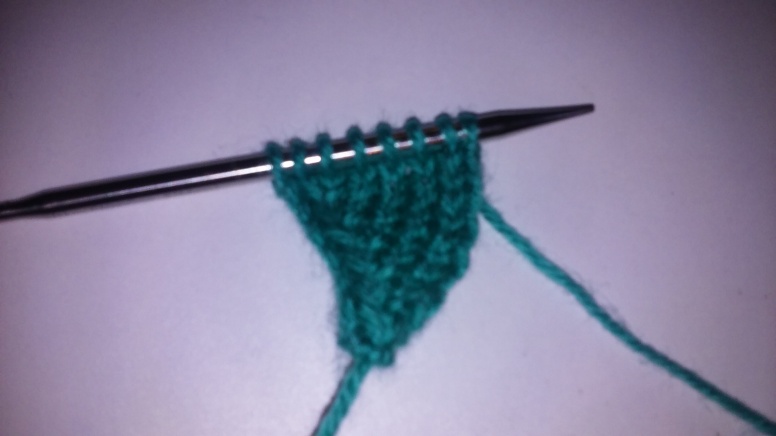
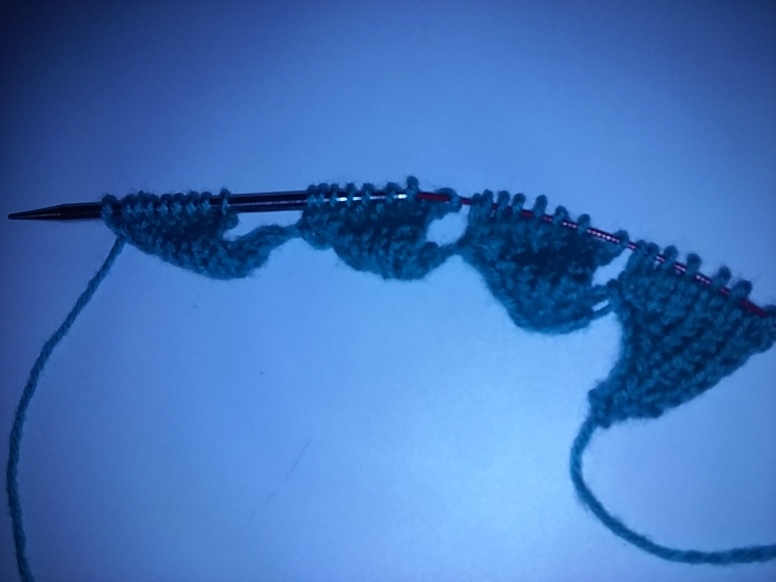
This picture is just to show where to measure the sweater. It is easier to take a picture of the process when the peice is smaller.

Change to circular needles when you need to (if you haven’t already.) Continue increasing in this manner until you have 12 stitches in each section ending in an even round.

Top of Flower Petals

We are going to start making the tops of the flower petals now. It may look complicated but I promise it is easier then you may think.

Round 27: (yarn over, knit 1, yarn over, knit 11, slip stitch marker) 8 times.

Round 29: * yarn over, knit 3, yarn over, knit 4  slip 1 stitch as if to knit, knit 2 together, pass slip stitch over the stitch you just made (from this point forward this stitch is written as: PSSO) , knit 4, slip stitch marker. Repeat from * around (112 stitches).

Here is a video on how to do the Knit 2 Togther:

Here is a video on how to do the PSSO:

Here is a video on how to slip a stitch.

Round 31: * yarn over, knit 5, yarn over, knit 3,  slip 1 stitchas if to knit, knit 2 together, psso, knit 3, slip stitch marker. Repeat from * around.

Round 33: * yarn over, knit 7, yarn over, knit 2, slip 1 stitch as if to knit, knit 2 together, psso, knit 2, slip stitch marker. Repeat from * around. (136 stitches).

Round 35: * yarn over, knit 9, yarn over, knit 1; slip 1 stitch as if to knit, knit 2 together, psso, knit 1, slip stitch marker. Repeat from * around.

Round 37 : * yarn over, knit 11, yarn over, slip 1 stitch as if to knit, knit 2 together, psso, slip stitch marker. Repeat from * around.

Round 39: * yarn over, knit 13, yarn over, slip stitch marker. Repeat from * around.

Round 41: * yarn over, knit to stitch marker. Repeat from * around.

Round 42 and all even number rounds: Knit all the way around.

wp-1470984697852.jpg

Continue repeating rounds 41 and 42 in pattern, increasing until you have the total of 16″ making sure to measure across center of the sweater. End with a increase or yarn over row.

Cast off for Sleeves

Next Round: knit the first set of stitches and the yarn over from the round before, place the second set of stitches on a holder or scrap yarn, cast on the same number of stitches using a provisional cast on (this will be the sleeve later). Continue knitting 4 more sets of stitches plus the yarn over from the previous round. Slip the next set stitches on a holder or scrap yarn. Cast on the same number of stitches using a provisional cast on. Here is the link for the Provisional Cast On Video. Or the entire video on the sleeve process.

Knit the last set of stitches and the yarn over from the previous round.

Continue in pattern, increasing until you have the 16″ total, making sure to measure across center of the sweater.

Continue to Edging

Edging

At this point you can remove the stitch markers except the first one to mark the beginning of the round.

This next part is called the Seed Stitch.

Round 1: * Purl 1, knit 1. Repeat from * around.

Round 2: * Knit 1, purl 1. Repeat from * around.

Work rounds 1 and 2, 3 times total.

Bind off in pattern. (Use stretchy Bind off)

Here is video on the best Stretchy Bind off Ever:

Sleeves:

Using 5mm (US 8) double pointed or circular needles. Place arm stitches from stitch holder  onto needle. Pick up 1 stitch from underarm, place maker to mark the beginning of round, place other side of stitches from provisional cast on needles, pick up 1 stitch.

Round 1-13: K in round 13 rows.

Round 14: *K1, k2tog, k to 3 stitches before the end of round. ssk, k1. Repeat from * 4 more times.

Next Round: K in round 9 more rows.

Continue to Sleeve Edging.

Sleeve Edging

Round 1: * Purl 1, knit 1. Repeat from * around.

Round 2: * Purl 1, knit 1. Repeat from * around.

Work rounds 1 and 2, 3 times total. Bind off in pattern. (Use stretchy Bind off)

That it’s done! Hope you enjoy!

Swirls Pinwheel Sweater

20160808_231117.jpg

I love to make these sweaters, although it is technically a cardigan. They are so easy to make and there are so many methods that will make knitting this sweater so much easier. I am making this pattern in the X-Small size, if you would like to have the full pattern for all the sizes from X-Small to 3X- Large you can buy this pattern at my Ravelry store here:

Swirl Cardigan at Knitting Knots Ravelry Store 

Today I am going to share those methods with you so let’s get started.

The Supplies:

Worsted Weight Yarn (1416 yards) I used Hobby Lobby’s I Love This Yarn in Lilac

4.5 mm (US 7) circular needles 40 cm,

60 cm and 80 cm (16”, 24”, and 32”).

4 mm (US G) crochet hook

8 Stitch markers, 2 stitch holders, scrap yarn.

 Gauge:

22 st. and 24 rows = 10cm / 4″ on

4.5mm (US 7) needles

Using 4.5 mm US size 7 double-circular needles cast on 8 st. I  like to use the sliding loop cast on so you don’t  have a hole in the center of you sweater.

20160809_172654

20160809_172642

20160809_172735

Here is a video on exactly how to do this:

Sliding Loop Video

Here’s a Tutorial for Two at a Time Magic Loop Socks on another one of my blog post just in case you need a refresher on the magic loop method. Here is the video for this method:

Magic Loop Video

As you can see in the picture above I have divided the sweater in half. Four stitched on each needle.

Round 1: Knit into the front and the back (kf&b) of each stitch -16 st. on round, mark the beginning of the round with a stitch marker and move this up every round.

20160809_173113

Round 2 and all even number rounds: Knit.

Round 3: K1, kf&b, repeat to end of round, making sure you do your last m1L on each needle.

Round 5: K3, m1L, repeat to end of round. (m1L stands for make one left and here is a video on how to do it:

M1L or Make One Left Video

At this point I find it is alot easier if you add a stitch maker after every section. Then you don’t have to worry about where the increases go. I do recommend counting when you do you increase to make sure all the sections have the same number of stitches.

20160809_184615.jpg

The one with the blue buttons helps me keep track of where the round starts. Because I am using the magic loop method the sweater is split in half just like knitting socks.  I use it whenever I can, so I don’t have to use DPNs. I put the different colored stitch maker after the first section and before the second section. (Although to knitting pattern on Ravelry has directions for DPNs if you would rather do it that way.)

Round 7: K4 m1L, repeat to end of round.

Round 9: K5 m1L, repeat to end of round.

Continue increasing in this manner until you have 16″ making sure to measure across the center of the sweater, ending with an odd row.

20160809_223048

Here is a picture of the way you measure for the sleeves. This is only 8″ and it need’s to be 16″ but it is easier to take a picture of it when it is smaller.

Cast off for Sleeves


ext Round: knit the first set of stitches and the m1L from the round before, place the second set of stitches on a holder, cast on the same number of stitches using a provisional cast on (this will be the sleeve later). Here is a video for the Provisional Cast On:

Provisional Cast On Video

Continue knitting 4 more sets of stitches plus the m1L from the previous round. Slip the next set stitches on a holder. Cast on the same number of stitches using a provisional cast on.

Knit the last set of stitches and the m1L from the previous round.

Continue in pattern, increasing until you have the 16″ making sure to measure across center of the sweater. Shown in photo above.

Edging

Round 1: (Purl 1, knit 1) repeat all the way around.

Round 2: (Knit 1, purl 1) repeat all the way around.

Work rounds 1 and 2, 3 times total.

Bind off in pattern. (Use stretchy Bind off)

Stretchy Bind Off In Pattern Video

Sleeves:

Using 4.5mm (US size 7,) circular needles. Place arm stitches from stitch holder onto needle. Pick up 1 stitch from underarm, place maker to mark the beginning of round, place other side of stitches from provisional cast on needles, pick up 1 stitch.

Round 1-13: K in round 13 rows.

Round 14: K1, K2TOG, K to 3 stitches before the end of round. SSK, K1.* Repeat between ** 4 more times.

K in round 9 more rows.

Continue to Edging.

Circle Sweater

Here’s a Picture of the one of these sweaters I made for my mother

Edging

Round 1: (Purl 1, knit 1) repeat all the way around.

Round 2: (Knit 1, purl 1) repeat all the way around.

Work rounds 1 and 2, 3 times total.

Bind off in pattern. (Use stretchy Bind off)

Stretchy Bind Off In Pattern Video

Abbreviations:

Kf&b – knit into the front and back of the stitch,

ssk – slip 2 sts separately to right needle as if to knit, then knit these 2 sts together by slipping left needle into them from left to right,

m1L – pick up stitch from the round below and then knit it.


Thank you so much.


Tutorial for Two at a Time Magic Loop Socks

IMAG0473

I love to knit socks, but I find that I often get bored with projects very easily. I have found that knitting socks two at a time with the magic loop method means that I am done and don’t have to remember the exact measurements for the first sock and when I’m done that is the end. I don’t have to worry about knitting the second sock. This is a very basic pattern and extremely easy no matter what you skill level is. Here is link to my pattern on Ravelry:

Ravelry Sock Knitting Pattern for all sizes

The great thing about this pattern is that it takes all the guess-work out of trying to figure out measurements. It even has half sizes. I have done all that for you from baby size 1 to Men’s size 14 1/2. There is a chart that tells you all you need to know for every given size. Now we are going to jump right in and get started.

The Cast on…

I love Judy’s magic cast on. It works great for getting both socks on the circular needle and it isn’t difficult at all. Here is a video for Judy’s magic Cast on.

Judy’s Magic Cast On Video

The number of stitches that you cast on depends on the size you are making. For this tutorial I am making the smallest size on the pattern and we will do 6, which is total of 12. I usually cast on half the number of total stitches. I find that this makes the toes the perfect length for any size foot. Here is a video on the magic loop method:

Magic Loop Video

Now we are going to do the increases.

Increases

Knit one round without any increases. My favorite increase for this method is to pick up stitches from the row below and each side. I find that it makes a pretty edge on the sock and is almost invisible. Here is a video and how to do that:

Toe Increases Video

You are only going to increase every other row. So round one is knit normally without any increase and round two is knit one stitch, increase then knit to 1 stitch before the end of side a then increase and knit one. You will do this on each side on both side a and side b on sock 1 and 2.

IMAG047620160807_230631

Foot

Once you have increased to the total number that you need, you knit until you have both socks to the length that you will need to start the heel. Now without the pattern trying to figure on the length of the sock before you start the heel can be a bit tricky but for baby to children age 4,  I do about 1 inch, for children age 5 to women’s size 6,  I do 1 & 1/2 inches and over that size I do 2 inches. I rarely make men’s socks but if you do it can take 2 & 1/2 to 4 inches depending on the size of the socks you are making. There are tons of great stitches and patterns you can use to make so really fancy socks. I like to do normal stockinette stitch because I find that it either is uncomfortable in my shoe and not visible when I am wearing shoes so it’s just a waste of my time. I use my superior knitting skills on afghan or sweater where it can really be seen and appreciated.


The Heel

IMAG0474

There are so many different heel methods out there. Feel free to do whatever heel you like best. I don’t like doing wrap and turns because of the holes that are in the heel. I have come up with a way to keep those out and make the heel look the best.

20160808_173011

I have tried many different methods and fine tuned this one to make it even better. It is a combination of a jo-jo heel and a short row heel without the wrap and turning. I have made this video to help with this method. If you have any questions please ask them. Often times this is the most confusing part of a sock, but it doesn’t have to be. Here is my video.

Heel Tutorial Video

The Ankle

20160808_174214

The first thing we have to do before we knit the ankle is to pick up stitches and either side of the heel to prevent a hole. I have found that it is easiest to pick up the stitches at the beginning of each side to make sure that there is no confusion. I usually do two stitches.

Now you knit for anywhere from 1/2 inch to 2 inches in stockinette stitch. I do this so that there is no stretching before you get to the actual leg on your sock. For this tutorial I knit 1/2 for the baby sock. On the round before you knit the leg make sure to decrease untill you have a number of stitches divisible by 4. I had 14 so I knit two together at the beginning and end of both side A and B for both socks.

The Leg

20160808_221315

My favorite way to finish a sock is with a 2×2 rib. I like that it stretches or gathers on your ankle and leg. I also like the way it looks. You can also do a more fancy stitch pattern that will be visible above your shoe. The length is also dependent on your preferences. For an anklets you would only knit about an inch and for a boot sock it would need to be at least 6 inches. I also like to have a decent length to fold the sock over so I usually do at lease 5 inches for my big size 10 feet.

Cast off20160808_224636

I like to cast of in pattern with a crochet hook and here is a great cast off for that. It shows how to do it with needles and crochet hook. Here is my video.

Stretchy Cast Off Video

That’s it we are all done. Feel free to send me any questions you might have. I hope you enjoyed this tutorial and I hope to see you again.


How to Knit a More Beautiful Entrelac

Years ago I was walking through my local Hobby Lobby store and saw the book about Entrelac. You know the one, with the pretty multi colored squares on the front. At the time I just thought it looked too difficult. Now I have knit since I was a child but never go serious about it until about 10 years ago. About five years ago I set out to learn how to do it. Little did I know at the time that there is nothing difficult about doing entrelac. There are tons of videos and tutorials out there that will show you how to do it, so I taught myself.

I fell in love with the pocesss and made blankets, sweaters, pillows and can even do it from corner to corner or in a cirlcle. There have always been things about it that I thought looked messy. So I set out to make it look even better so after years of perfecting it I am finally really to show you what I learned.

Cast On

First is the cast on. You will find a tutorial on ravelry on how to do this method without having to cast on all your stitches first. Ravelry entrelac-co-method The reason I like this method is for two reasons:

  • It allows me to not have to worry about doing math. And for those of you who know figuring out the length and width of a entrelac square isn’t very easy. I have a tendency to either make too many or way too few.
  • It can makes the edges look better with this method. As I will explain in this tutorial.

Now the process:

I have changed a few things about this cast on method to make the end result look better.

  1. Place a slip knot on your left needle.
    20160527_162053

    Slip Knot

  2. Knit in the front and back of that slip knot. 2 sts (You will find unlike the original tutorial this is the only time I will use this increase.)
    20160527_162146

    Kf&B

*If you don’t know how to knit backwards or technically purl backwards I highly recommend that you learn how.  It makes doing entrelac so much easier. Here is a  video on how to do it. Very Pink Knits knitting backwards

  1. Slip 1, Purl back (AND ALL ODD ROWS)

*This is also the only time I slip stitches, when the piece is at an edge. It makes it cleaner there. I find that this it much messier when it’s on the edge that you will pick up stitches later. So unlike most methods that tell you to slip the stitches you will pick up later it doesn’t look very nice on the finished product.

  1. Knit 1, m1, K 1

* For this increase I lift the stitch for the row below on the left side of the stitch just worked and knit it. This makes for a really pretty edge on the bottom of the work which looks so much better the original.

M1L Video

20160527_163115

M1 increase

  1. K 2 sts, m1, k 1
  2. K until one stitch left, m1, k last st
  3. Slip 1, Purl back

Repeat rows 8 and 9 until desire number of stitches.  For this tutorial I did eight

20160527_162548

First triangle

  1. Now k 7, m1, k1

Second foundation triangle and each one after that

  1. P1
  2. Kfb
  3. Slip 1, P
  4. K until one stitch left, m1, k last st

Repeat rows 3 & 4 until you have 8 sts.

  1. Now k 7, m1, k1

Repeat these 10 rows until you have the desired number of triangles.  On the last triangle do not do the last m1 on For this tutorial I did 4.

20160527_164340

First 4 entrelac triangles

First left leaning triangle

  1. With new color, p 2
    20160527_165439

    Sliding Loop Entrelac

**Here is where the sliding loop comes into play. I makes the joins beautiful. Here’s a tutorial on the process: Holli Yeoh Sliding Loop Technique

Another great thing about the sliding loop is that you can weave in the ends as you go. Shown here: Weaving in Ends as you knit

  1. Kfb
  2. Slip 1, Purl back 2 sts. (make sure the tighten after last st then knit one more st and slide out loop. (ALL ODD ROWS))
  3. K until one stitch left, m1, k last st

Repeat last two rows until all the sts on the right needle are gone and 8 on left

*On the knit row don’t do the last m1 you should have 8 sts.

Right leaning rectangles

  1. Pick up 8 sts, k 1, slide loop

Here is a video on where to pick up sts.

  1. Purl back (no more slipped sts until last triangle.)
  2. Knit
  3. Purl

Repeat these two rows until there are no more sts on right needle

Continue in this manner all the way across

Last triangle

  1. Pick up 8 sts
  2. Slip 1, knit across
  3. Purl to last 3 sts, p2tog, p1
  4. Slip 1, knit across

Repeat to until 3 st

  1. P2tog, p1
  2. Slip 1, k1
  3. P2tog

Cut yarn leaving six inch tail

Left leaning rectangles

  1. Slip 1, with new color pick up 7 sts knit first st of last right leaning rectangle and slide out a loop
  2. Purl
  3. Repeat these two rows until all sts are off the left needle
  4. Repeat steps 1-4 in this manner until all the way across the row.

Top rectangle

  1. In new color, Slip 1, pick up 7 sts plus knit first st on right leaning rectangle and slide out loop
  2. Purl
  3. Slip 1, knit across, plus one for sliding loop
  4. Purl until 3 sts left, p2tog, p 1
  5. Repeat these two rows until only one loop on needle
  6. Repeat 1-5 in this manner all the way across
  7. Fasten off

So What do you think? Beautiful Right? Feel free to contact me with any questions.

Aubrey

Find me at pinterest @ https://www.pinterest.com/aubreyw78/

and Facebook Aubrey’s Sensations